入门体验
课程基于2024年React Native 0.73最新版本
iOS 环境搭建和第一个项目跑起来
开发环境
使用的环境是 MacOS系统 iOS平台
CocoaPods已经安装1.11.2版本
homebrew和Node & Watchman大家自行安装,环境这块大家根据官方网站操作即可
版本号不一定要严格一致,比如我的node就是v20.8.1
创建工程
mkdir -p ~/Documents/rn/proj # 创建工程目录(可以创建到其他地方,最好不要有中文、空格等)
npx react-native@latest init AwesomeProject # 创建工程,这个过程挺慢,慢慢等吧
安装过程中看到比较慢的地方是 Downloading template,也就是在下载模板.
这地方明显可以优化,比如我们提前下载好模板放到内网环境,然后使用--template来使用下载好的模板
安装过程中的提示 Do you want to install CocoaPods now? Only needed if you run your project in Xcode directly … no
我已经安装了CocoaPods,但是这里竟然还提示我安装(安装速度还非常慢),直接键盘输入n即可跳过安装
info 💡 To enable automatic CocoaPods installation when building for iOS you can create react-native.config.js with automaticPodsInstallation field.
For more details, see https://github.com/react-native-community/cli/blob/main/docs/projects.md#projectiosautomaticpodsinstallation

✔ Initializing Git repository


  Run instructions for Android:
    • Have an Android emulator running (quickest way to get started), or a device connected.
    • cd "/Users/lichanghong/Documents/xxx/proj/AwesomeProject" && npx react-native run-android

  Run instructions for iOS:
    • cd "/Users/lichanghong/Documents/xxx/proj/AwesomeProject/ios"

    • Install Cocoapods
      • bundle install # you need to run this only once in your project.
      • bundle exec pod install
      • cd ..

    • npx react-native run-ios
    - or -
    • Open AwesomeProject/ios/AwesomeProject.xcodeproj in Xcode or run "xed -b ios"
    • Hit the Run button

  Run instructions for macOS:
    • See https://aka.ms/ReactNativeGuideMacOS for the latest up-to-date instructions.
根据日志信息操作一遍,bundle install 和bundle exec pod install都是比较耗时的操作,有的是从github下载,所以可能会各种失败,重试即可(有梯子更佳)。
后续这块是可以将组件私有化来解决的,我们后面也会一步一步的教大家处理
俩小时后,终于pod install完成,运行iOS项目
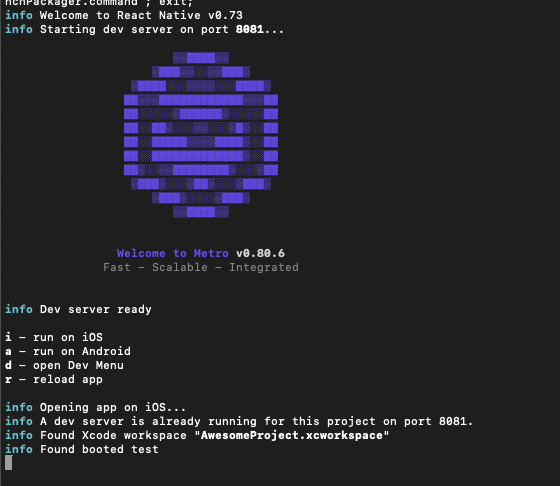
按照提示输入i,过一会竟然报错了!报错信息:
error Failed to install the app on the device because we couldn't execute the "ios-deploy" command. Please install it by running "brew install ios-deploy" and try again.
错误处理
根据提示执行一下安装 brew install ios-deploy,安装完成后重新执行 npx react-native run-ios
info Building (using "xcodebuild -workspace AwesomeProject.xcworkspace -configuration Debug -scheme AwesomeProject -destination id=00008101-001275D93643001E")
info 💡 Tip: Make sure that you have set up your development environment correctly, by running npx react-native doctor. To read more about doctor command visit: https://github.com/react-native-community/cli/blob/main/packages/cli-doctor/README.md#doctor
error Failed to build iOS project. "xcodebuild" exited with error code '70'. To debug build logs further, consider building your app with Xcode.app, by opening 'AwesomeProject.xcworkspace'.
Command line invocation:
/Applications/Xcode.app/Contents/Developer/usr/bin/xcodebuild -workspace AwesomeProject.xcworkspace -configuration Debug -scheme AwesomeProject -destination id=00008101-001275D93643001E
User defaults from command line:
IDEPackageSupportUseBuiltinSCM = YES
2024-03-19 17:06:41.576 xcodebuild[7318:72965] Writing error result bundle to /var/folders/tq/stv_grp52rn8ftjm4d_c7_fw0000gn/T/ResultBundle_2024-19-03_17-06-0041.xcresult
xcodebuild: error: Unable to find a destination matching the provided destination specifier:
{ id:00008101-001275D93643001E }
Ineligible destinations for the "AwesomeProject" scheme:
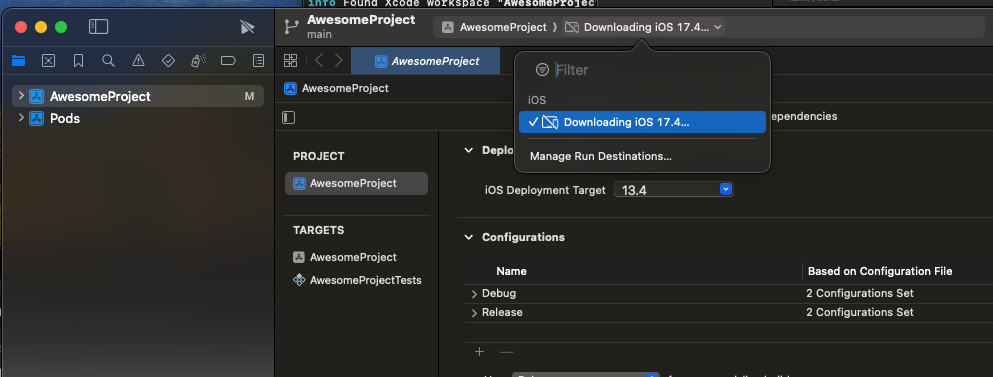
{ platform:iOS, id:dvtdevice-DVTiPhonePlaceholder-iphoneos:placeholder, name:Any iOS Device, error:iOS 17.4 is not installed. To use with Xcode, first download and install the platform }
使用xcode打开iOS工程发现失败原因,因为我的macos系统刚刚升级到最新,xcode也刚升级到Version 15.3 (15E204a),没有安装模拟器,直接点击get按钮安装即可
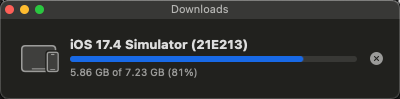
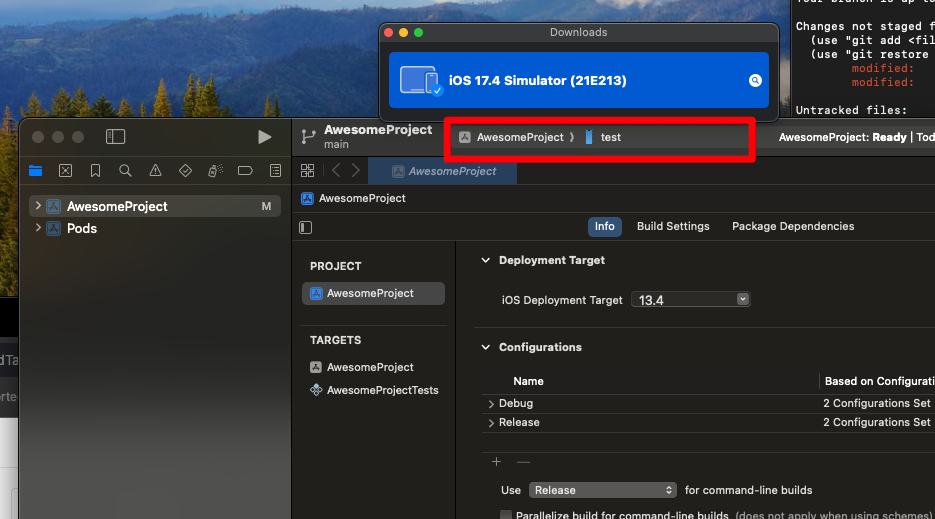
安装完以后的样子
**error** Failed to build iOS project. "xcodebuild" exited with error code '65'. To debug build logs further, consider building your app with Xcode.app, by opening 'AwesomeProject.xcworkspace'.
。。。
。。。
省略一大堆信息
warning: Run script build phase '[CP-User] [Hermes] Replace Hermes for the right configuration, if needed' will be run during every build because it does not specify any outputs. To address this warning, either add output dependencies to the script phase, or configure it to run in every build by unchecking "Based on dependency analysis" in the script phase. (in target 'hermes-engine' from project 'Pods')
/Users/lichanghong/Documents/xxx/proj/AwesomeProject/ios/AwesomeProject.xcodeproj: error: Signing for "AwesomeProject" requires a development team. Select a development team in the Signing & Capabilities editor. (in target 'AwesomeProject' from project 'AwesomeProject')
warning: Run script build phase 'Bundle React Native code and images' will be run during every build because it does not specify any outputs. To address this warning, either add output dependencies to the script phase, or configure it to run in every build by unchecking "Based on dependency analysis" in the script phase. (in target 'AwesomeProject' from project 'AwesomeProject')

** BUILD FAILED **
关键信息是这句:"AwesomeProject" requires a development team 就是工程证书配置问题,相信只有做iOS的才能有所领悟
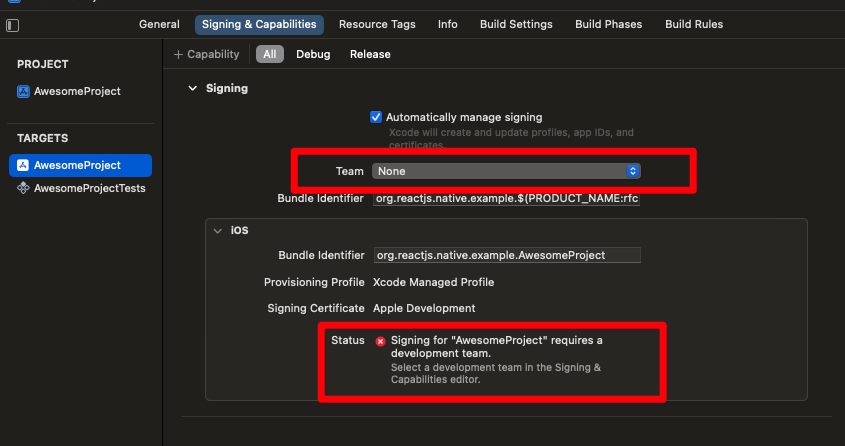
如上图,自动签名,选一个Team即可
大功告成
终于成功了:
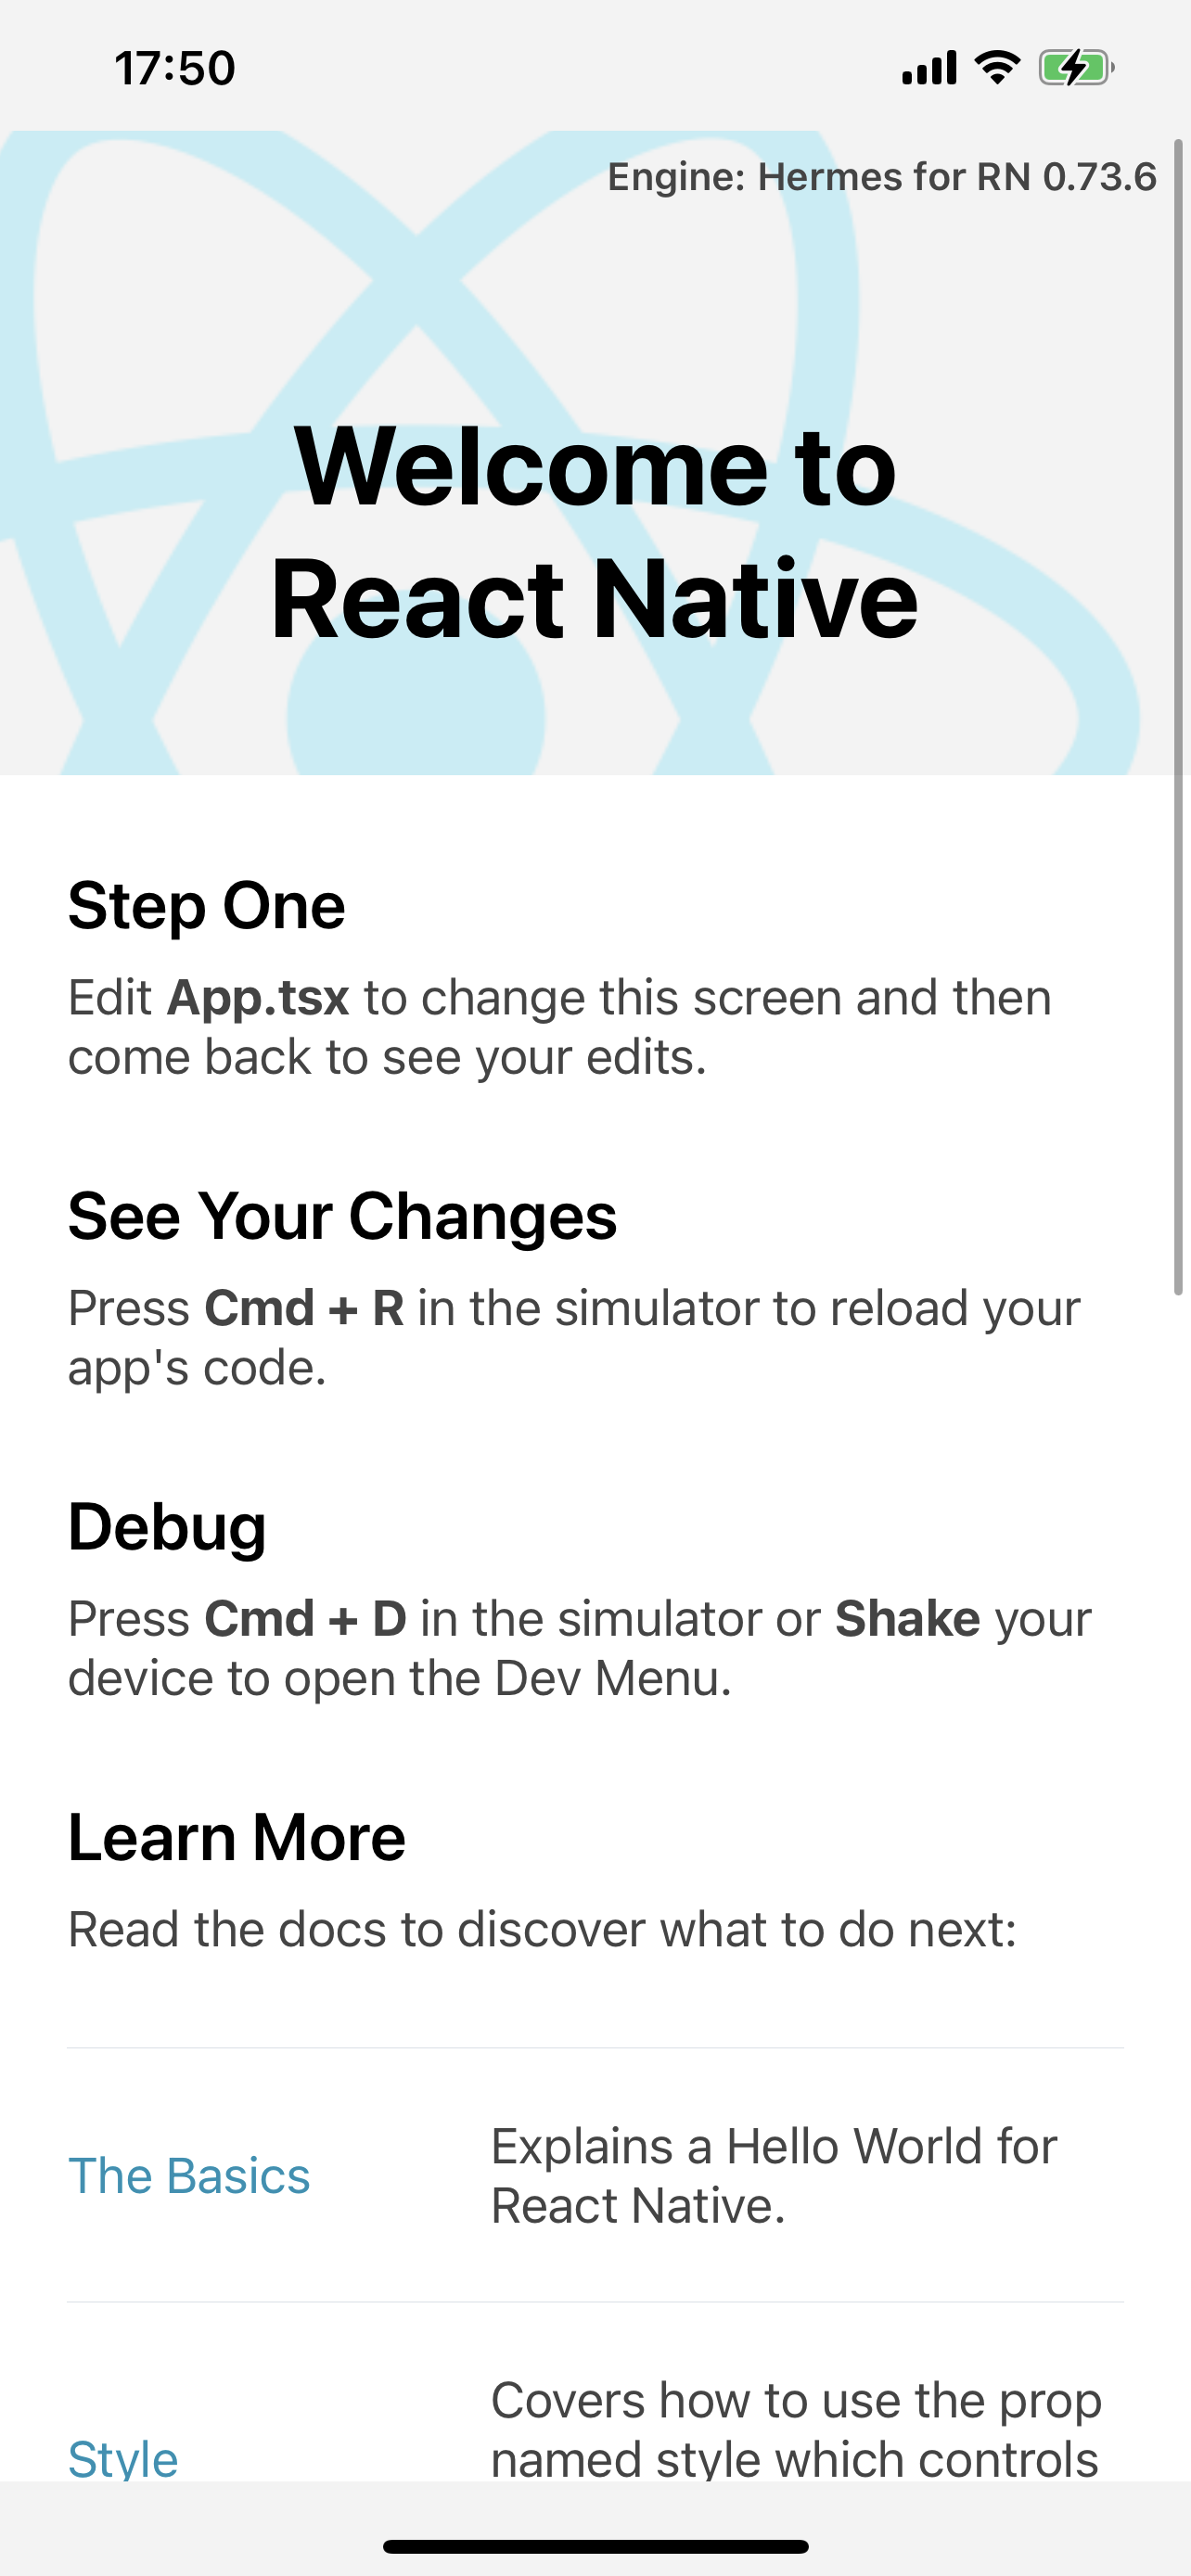
然后大家可以修改一些工程内容,体验一下
安卓 环境搭建和第一个项目跑起来
开发环境
使用的环境是 MacOS系统 安卓平台 必须安装的依赖有:Node、JDK 和 Android Studio。
虽然你可以使用任何编辑器来开发应用(编写 js 代码),但你仍然必须安装 Android Studio 来获得编译 Android 应用所需的工具和环境。
Node & Watchman
我们推荐使用Homebrew来安装 Node 和 Watchman。
brew install node@18
brew install watchman
如果你已经安装了 Node,请检查其版本是否在 18 以上。
Watchman则是由 Facebook 提供的监视文件系统变更的工具。安装此工具可以提高开发时的性能(packager 可以快速捕捉文件的变化从而实现实时刷新)。
Java Development Kit
我们推荐使用Homebrew来安装由 Azul 提供的 名为 Zulu 的 OpenJDK 发行版。
brew tap homebrew/cask-versions
brew install --cask zulu
React Native 当前需要 Java Development Kit [JDK] > 17。你可以在命令行中输入 javac -version(请注意是 javac,不是 java)来查看你当前安装的 JDK 版本。
目前我安装的��是:jdk21.0.1
官方教程让安装的是zulu17,并不能成功
Android 开发环境
如果你之前没有接触过 Android 的开发环境,那么请做好心理准备,这一过程相当繁琐。
国内用户必须必须必须有稳定的代理软件,否则在下载、安装、配置过程中会不断遭遇链接超时或断开,无法进行开发工作。
1. 安装 Android Studio
首先下载和安装 Android Studio,国内用户可能无法打开官方链接,请自行使用搜索引擎搜索可用的下载链接。
确保选中了以下几项:
- Android SDK
- Android SDK Platform
- Android Virtual Device
然后点击"Next"来安装选中的组件。
如果因为网络原因失败卡死,可以取消后在设置页面搜索sdk,找到Android SDK继续安装
在 SDK Manager 中选择"SDK Platforms"选项卡,然后在右下角勾选"Show Package Details"。展开Android 13 (Tiramisu)选项,确保勾选了下面这些组件(如果看不到这个界面,则需要使用稳定的代理软件):
- Android SDK Platform 33
- Intel x86 Atom_64 System Image(官方模拟器镜像文件,使用非官方模拟器不需要安装此组件)
然后点击"SDK Tools"选项卡,同样勾中右下角的"Show Package Details"。展开"Android SDK Build-Tools"选项,确保选中了 React Native 所必须的33.0.0版本。你可以同时安装多��个其他版本。
点击"Apply"来下载和安装选中的这些组件。
配置 ANDROID_HOME 环境变量
React Native 需要通过环境变量来了解你的 Android SDK 装在什么路径,从而正常进行编译。
具体的做法是把下面的命令加入到 shell 的配置文件中。如果你的 shell 是 zsh,则配置文件为~/.zshrc,如果是 bash 则为~/.bash_profile(可以使用echo $0命令查看你所使用的 shell。):
# 如果你不是通过Android Studio安装的sdk,则其路径可能不同,请自行确定清楚
export ANDROID_HOME=$HOME/Library/Android/sdk
export PATH=$PATH:$ANDROID_HOME/emulator
export PATH=$PATH:$ANDROID_HOME/tools
export PATH=$PATH:$ANDROID_HOME/tools/bin
export PATH=$PATH:$ANDROID_HOME/platform-tools
使用source $HOME/.zshrc命令来使环境变量设置立即生效(否则重启后才生效)。可以使用echo $ANDROID_HOME检查此变量是否已正确设置。
创建工程
如果你之前全局安装过旧的react-native-cli命令行工具,请使用npm uninstall -g react-native-cli卸载掉它以避免一些冲突:
npm uninstall -g react-native-cli @react-native-community/cli
使用 React Native 内建的命令行工具来创建一个名为"AwesomeProject"的新项目。这个命令行工具不需要安装,可以直接用 node 自带的npx命令来使用:
npx react-native@latest init AwesomeProject
根据提示执行下列步骤
• Have an Android emulator running (quickest way to get started), or a device connected.
• cd "/Users/xxx/Documents/proj/AwesomeProject" && npx react-native run-android
使用 Android 模拟器
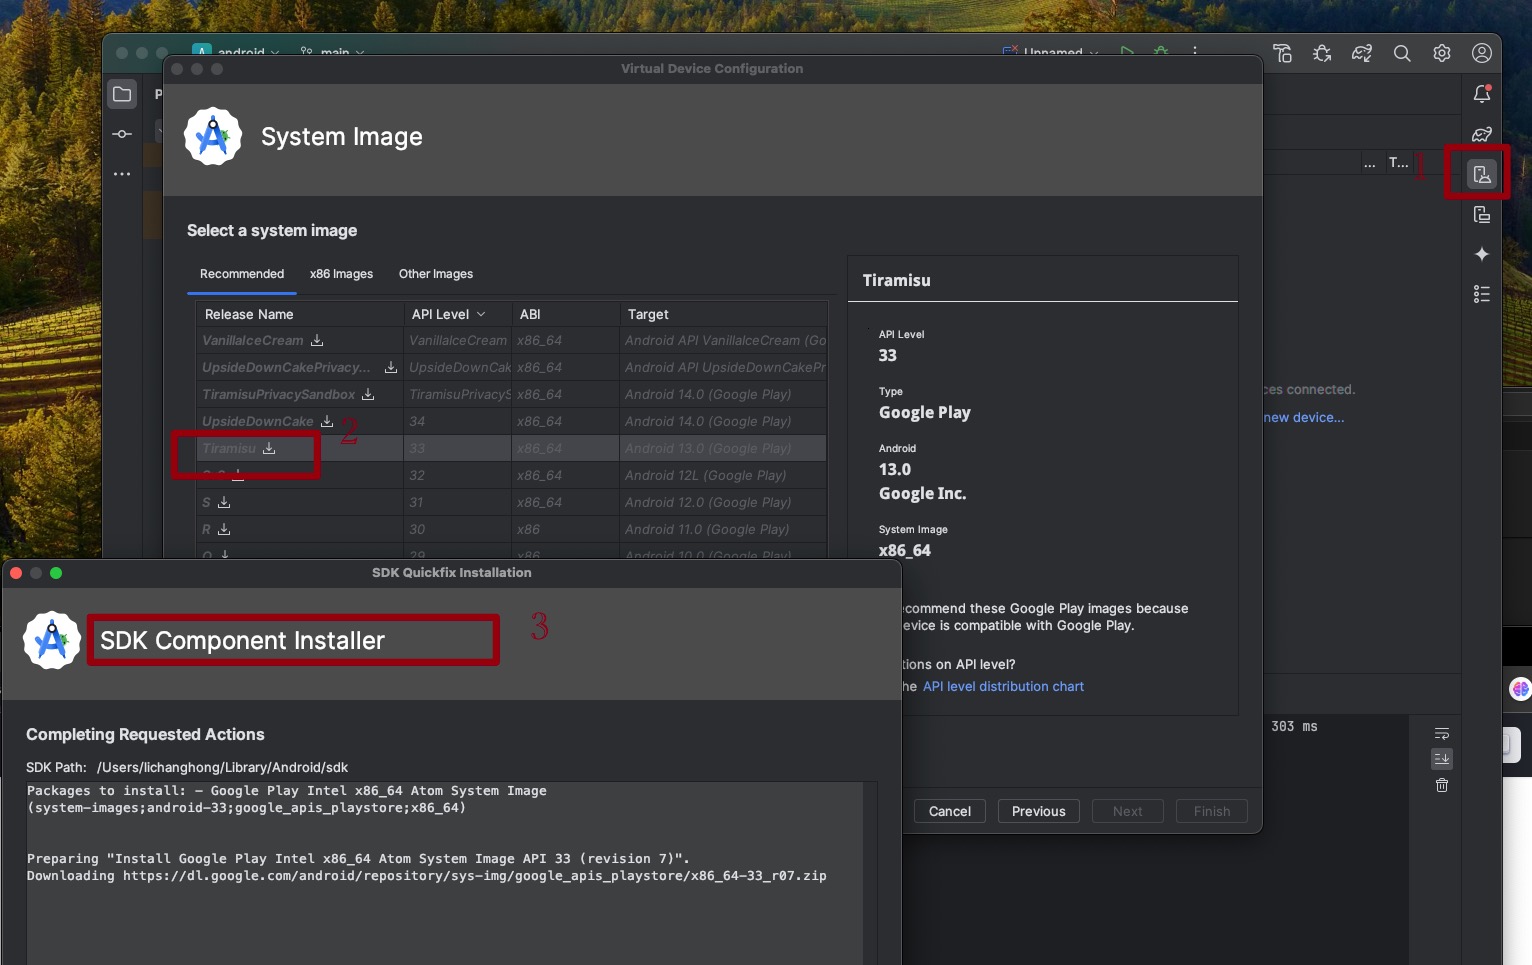
你可以使用 Android Studio 打开项目下的"android"目录,然后可以使用"AVD Manager"来查看可用的虚拟设备
如果你刚刚才安装 Android Studio,那么可能需要先创建一个虚拟设备。点击"Create Virtual Device...",然后选择所需的设备类型并点击"Next",然后选择Tiramisu API Level 33 image. 然后就会安装
请不要轻易点击 Android Studio 中可能弹出的建议更新项目中某依赖项的建议,否则可能导致无法运行。
编译并运行 React Native 应用
确保你先运行了模拟器或者连接了真机,然后在你的项目目录中运行yarn android或者yarn react-native run-android
此命令会对项目的原生部分进行编译,同时在另外一个命令行中启动Metro服务对 js 代码进行实时打包处理(类似 webpack)。Metro服务也可以使用 yarn start命令单独启动。
错误处理
执行yarn android的时候,下载超时错误,重试。。。。这个等待时间较长
经实践,这个基本都是失败告终,大家可以换源解决
// 查询源
yarn config get registry
// 更换国内源
yarn config set registry https://registry.npmmirror.com
// 恢复官方源
yarn config set registry https://registry.yarnpkg.com
安装完后报错
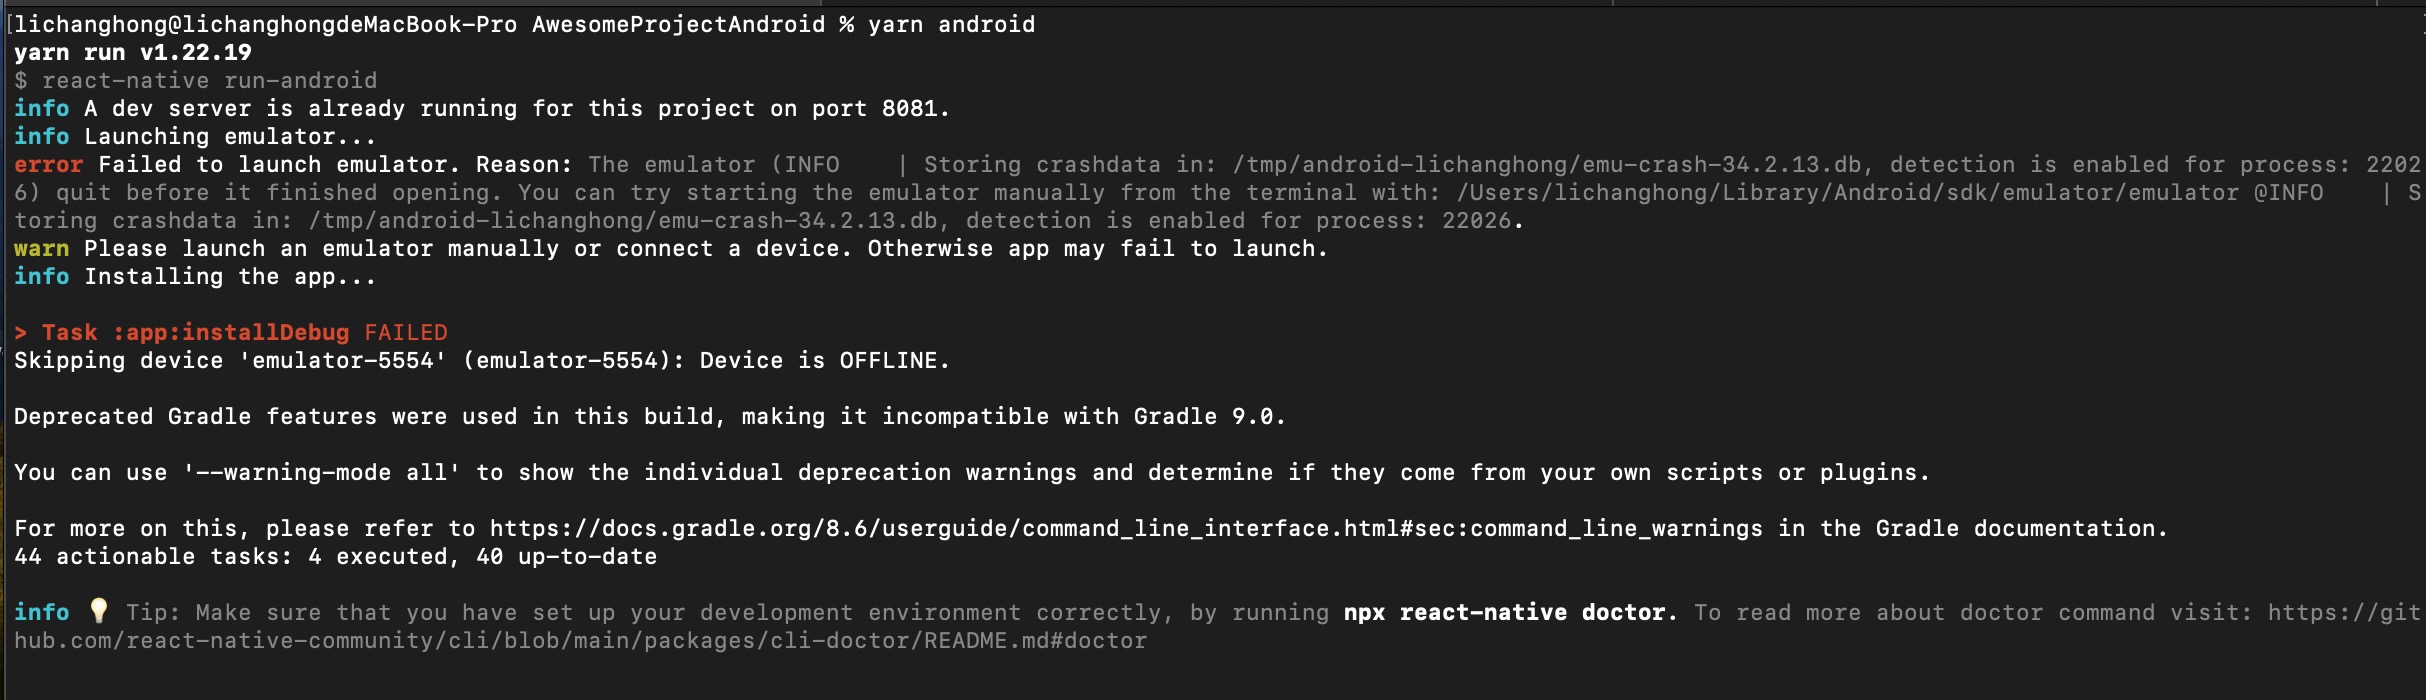
先启动模拟器
大功告成
终于成功了
然后大家可以修改一些工程内容,体验一下
问题补充
除了以下问题,肯定还有其他问题,大家可以联系我补充
brew install 错误
个别mac电脑在brew install的时候报错:unknown or unsupported macOS version: :dunno
解决方案是,先执行一下这句:brew update-reset
Download template error Installing pods failed
Downloading templateerror Installing pods failed. This doesn't affect project initialization and you can safely proceed.
However, you will need to install pods manually when running iOS, follow additional steps in "Run instructions for iOS" section.
✖ Downloading template
是因为镜像源的问题网络太卡加载不出来
切换镜像源: npx nrm use taobao, 不要觉得自己有梯子,有梯子先关掉,切到淘宝源再执行npx react-native init AwesomeProject --skip-install
Command run-android unrecognized.
在执行react-native init FirstApp(自己的项目名称) 创建项目后,
再执行react-native run-android的时候,会报Command 'run-android' unrecognized.
 Make sure that you have run 'npm install' and that you are inside a react-native project.的错误。
首先cd进入自己的项目下,然后再执行命令npm install,这期间会需要几分钟,等它安装完毕。最后执行react-native run-android命令
Processing templateUsage Error
错误内容: Processing templateUsage Error: The nearest package directory (/Users/abc/Documents/rn/AwesomeProject) doesn't seem to be part of the project declared in /Users/abc.
这种问题一般是其他目录下有这俩文件:yarn.lock 或者 package.json, 比如上面的那个报错提示里有 the project declared in /Users/abc., 我们执行cd /Users/abc到问题目录下,然后ls查看是否有yarn.lock 或者 package.json,如果有就删除
bundle exec pod install报错
关键错误点: Error: Cannot find module 'react-native/scripts/react_native_pods.rb' 全部错误信息:
[!] Invalid `Podfile` file: [!] /usr/local/bin/node -p require.resolve(
    "react-native/scripts/react_native_pods.rb",
    {paths: [process.argv[1]]},
  ) /Users/xxx/Documents/notes/xxx/rn/AwesomeProject/ios

node:internal/modules/cjs/loader:1051
  throw err;
  ^

Error: Cannot find module 'react-native/scripts/react_native_pods.rb'
Require stack:
- /Users/xxx/Documents/notes/xxx/rn/AwesomeProject/ios/[eval]
    at Module._resolveFilename (node:internal/modules/cjs/loader:1048:15)
    at Function.resolve (node:internal/modules/helpers:136:19)
    at [eval]:1:9
    ...
    at node:internal/main/eval_string:50:3 {
  code: 'MODULE_NOT_FOUND',
  requireStack: [
    '/Users/xxx/Documents/notes/xxx/rn/AwesomeProject/ios/[eval]'
  ]
}

Node.js v20.8.1
先回到根目录下执行:npm install;然后重新执行bundle exec pod install
检查环境是否OK
通过一堆环境设置和安装,有哪些还有问题?使用下面命令检查环境是否OK: npx react-native doctor
初始工程修改体验
React 的核心概念
- components 组件
- JSX
- props 属性
- state 状态
自定义组件
在App.tsx文件的53行开始自定义组件
// 组件1
function MyBtn() {
  return <Text style={{fontSize: 20, color: 'red'}}>hello, this is MyButton</Text>
}

// 组件2
const MyBtn2 = () => <Text>hello, this is MyBtn2</Text>

// 组件3
const MyBtn3 = () => (
  <>
    <Text>hello, this is MyBtn3</Text>
    <Text>hello, this is MyBtn3</Text>
  </>
)

// 组件4
const MyBtn4 = () => {
  return (
    <>
      <Text>hello, this is MyBtn4</Text>
      <Text>hello, this is MyBtn4</Text>
    </>
  )
}
在70行使用MyButton组件
 <MyBtn></MyBtn>
 <MyBtn2></MyBtn2>
 <MyBtn3></MyBtn3>
 <MyBtn4></MyBtn4>
注释掉ScrollView相关代码后查看效果
组件就是函数,每个组件的根标签不能有多个
JSX语法简介
React 和 React Native 都使用JSX 语法,这种语法使得你可以在 JavaScript 中直接输出元素:<Text>Hello, I am your cat!</Text>。React 的文档有一份完整的JSX 指南可供你参考。因为 JSX 本质上也就是 JavaScript,所以你可以在其中直接使用变量。
// 组件5
const Cat = () => {
  const name = "hellokity"
  return (
    <>
      <Text>hello, this is {name}</Text>
    </>
  )
}
括号中可以使用任意 JavaScript 表达式,包括调用函数,例如{getFullName("a", "b", "c")}
const getFullName = (firstName: string, secondName: string, thirdName: string) => {
  return firstName + " " + secondName + " " + thirdName;
}

const Cat = () => {
  return (
    <Text>
      Hello, I am {getFullName("Rum", "Tum", "Tugger")}!
    </Text>
  );
}
你可以把括号想象成在 JSX 中打开了一个可以调用 JS 功能的传送门!
Props属性
Props 是“properties”(属性)的简写。Props 使得我们可以定制组件。比如可以给每只<Cat>一个不同的name
interface Props {
  name: string
}

const Cat = (props: Props) => {
  return (
    <View>
      <Text>Hello, I am {props.name}!</Text>
    </View>
  );
}

// 使用
<Cat name='hello'></Cat>
<Cat name='kati'></Cat>
State 状态
如果把 props 理解为定制组件渲染的参数, 那么state就像是组件的私人数据记录。
按惯例来说,props 用来配置组件的第一次渲染(初始状态)。state 则用来记录组件中任意可能随时间变化的数据。下面示例的情景发生在一个猫咪咖啡馆中,两只猫咪正嗷嗷待哺。它们的饥饿程度会随着时间变化(相对地,它们的名字就不会变化),因此会记录在状态中。示例中还有一个喂食按钮,一键干饭,扫除饥饿状态!
你可以使用React 的useState Hook来为组件添加状态。Hook (钩子)是一种特殊的函数,可以让你“钩住”一些 React 的特性。例如useState可以在函数组件中添加一个“状态钩子”,在函数组件重新渲染执行的时候能够保持住之前的状态。
import React, { useState } from "react";
import { Button, Text, View } from "react-native";

const Cat = (props) => {
  const [isHungry, setIsHungry] = useState(true);

  return (
    <View>
      <Text>
        I am {props.name}, and I am {isHungry ? "hungry" : "full"}!
      </Text>
      <Button
        onPress={() => {
          setIsHungry(false);
        }}
        disabled={!isHungry}
        title={isHungry ? "给点牛奶喝!" : "Thank you!"}
      />
    </View>
  );
}

const Cafe = () => {
  return (
    <>
      <Cat name="张三" />
      <Cat name="李四" />
    </>
  );
}

export default Cafe;
首先要从 react 中引入useState:
import React, { useState } from 'react';
然后可以通过在函数内调用useState来为组件声明状态。在本示例中 useState 创建了一个 isHungry 状态变量:
const Cat = (props) => {
  const [isHungry, setIsHungry] = useState(true);
  // ...
};
你可以使用useState来记录各种类型的数据: strings, numbers, Booleans, arrays, objects。 useState实质上做了两件事情:
- 创建一个“状态变量”,并赋予一个初始值。上面例子中的状态变量是isHungry,初始值为true。
- 同时创建一个函数用于设置此状态变量的值——setIsHungry。
脑海中应该形成这样一种模式:[<取值>, <设值>] = useState(<初始值>)
下面我们添加一个按钮Button组件,并给它一个onPress的 prop:
<Button
  onPress={() => {
    setIsHungry(false);
  }}
  //..
/>
现在当用户点击按钮时,onPress函数会被触发,从而调用setIsHungry(false)。此时状态变量isHungry就被设为了false。当isHungry为 false 的时候,Button的disabled属性就变成了true ,其title也相应变化:
<Button
  //..
  disabled={!isHungry}
  title={isHungry ? 'Pour me some milk, please!' : 'Thank you!'}
/>
你可能注意到虽然isHungry使用了常量关键字const,但它看起来还是可以修改!简单来说,当你调用setIsHungry这样的设置状态的函数时,其所在的组件会重新渲染。此处这一整个Cat函数都会从头重新执行一遍。重新执行的时候,useState会返回给我们新设置的值。
最后再把猫咪放进Cafe组件:
const Cafe = () => {
  return (
    <>
      <Cat name="Munkustrap" />
      <Cat name="Spot" />
    </>
  );
};
注意到上面的<>和</>了吗? 这一对 JSX 标签称为Fragments(片段)。由于 JSX 的语法要求根元素必须为单个元素,如果我们需要在根节点处并列多个元素,在此前不得不额外套一个没有实际用处的View。但有了 Fragment 后就不需要引入额外的容器视图了。
现在你应该已经差不多了解 React 和 React Native 的核心组件与思想了。下面可以试着深入学习一些核心组件的用法,比如如何处理文本输入<TextInput>。这些UI组件大同小异,我推荐大家下一步就是学习React基础知识。